Showing posts with label spring. Show all posts

Thursday, May 24, 2012

our homestead: ducklings hatching

Right now as I quickly write this blog, my ducklings are hatching down below in the coop. This morning while I was doing my normal duck routine (let the birds out, refresh their water, check their feed, check for eggs), I had the thought to check on my brooding ladies, as their "due date" was last week. I opened up the nest box and noticed a cracked egg shell and my ducks (two are brooding right now) were both sitting in the same nest box. So weird. I began to move one duck over to her original nest box and saw a tiny, tiny pair of pink feet and some yellow feathers peak out. WHOAH! DUCKLINGS! I bet the second brooder was sitting in the wrong nest box because she wanted those ducklings (talk about baby fever). I have a feeling her clutch is right about to hatch as well. Anyway, I took some hurried photos and ran around finding materials to build my ladies and their babies a separate partition from the rest of the flock (to keep the ducklings safe). My guess is I'll come home from work this evening to find even more ducklings. I'll be sure to post better photos soon...I just didn't want to disturb my gals too much or their little darlings. Anyway, here are the quick photos I was able to snag...


Monday, May 14, 2012

our homestead: garden's growing

My little garden is off to a good start. I am beyond happy that the growing season is here again. Every morning I enjoy the ritual of letting my birds out, watering the plants in my greenhouse and watching the growth of my vegetable garden while casually plucking weeds. I'm fairly tired from a busy day of working the yard and I'm about to go sit out on the porch for the remainder of this warm evening we're having to listen to the sounds of nightfall and to smell the sweet scent of my white lilac (it seems to emit the most perfume at dusk), so I'll post a few photos of my garden's current state.
Wild numbers of sunflowers are popping up every which way around my yard. Aww, we'll be so lucky when they are all flowering.
Nasturtiums, German Chamomile and poppies are all growing.
Velvety and tangy 'Apple Mint' growing taller everyday. I'm looking forward to some summer mojitos made with this. Yum!
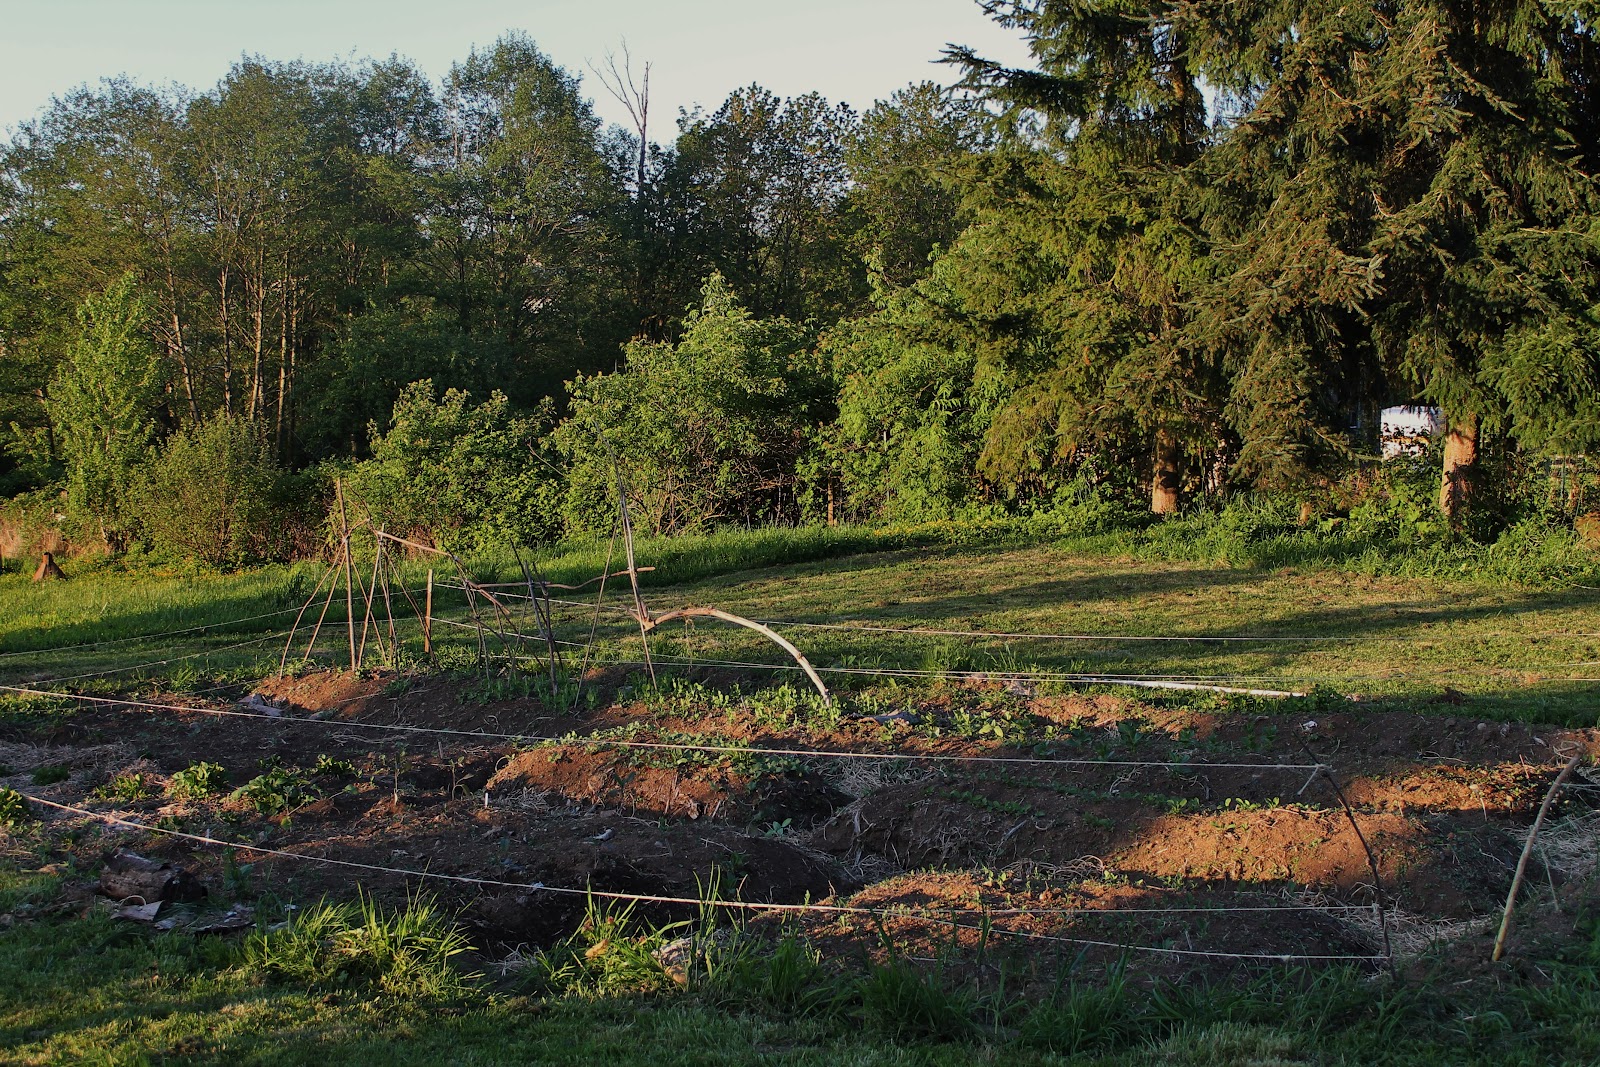
Our main vegetable patch (we have a few other patches scattered around the yard). This is also where we grew our garlic patch last year. I made some nice raised beds and everything I've planted here is coming up.
I've already snuck a few 'French Breakfast Radishes' from our radish patch. Oh so sweet and adorable.
One of my little broccoli plants. This is my first year growing broccoli.
Potatoes! This year I planted two potato patches: one for us and one for the ducks. I read that mashed potatoes make for a good filler food for ducks, so we'll be able to stretch our feed dollars more.
Baby 'Lacinato Kale' peeking out of the soil. Waiting to be braised with some lemon and chickenstock.
Our arugula patch. Soon this will grace my homemade pizzas with pancetta and goatcheese. Oh baby! 
Itty-bitty kohlrabi: one of my favorite vegetables. When it's full grown, its stems will swell into little green baseballs. You peel them and snack on them fresh or can roast them up. They are in the cabbage family and taste like sweet broccoli.
'Arabian Nights Nasturtiums' peeking out of the ground in the vegetable garden. Their flowers are supposed to be red, white and purple in lieu of the usual orange and yellow. They'll help ward off certain insect pests and will be a sweet and spicy addition to our salads.
Fava beans! These guys are sweet and nutty, like a delicious lima bean (har har), and can be planted with peas as they are more of a colder season bean.
Snap and shelling peas coming up below my branch pea trellis.
My tomatoes are in full swing in the greenhouse. I think they are taller and healthier than they were last year at this time. In fact, I'll have to go back and check, but I'm not even sure I had them out to the greenhouse yet last year.
I also have lots of tomato flowers blooming, meaning I'll have tomatoes sooner this year than last.

Oh what have we here! My first "tomato".
Here's one of my 'English Brown Turkey' figs, leafing out.
And the peppers!
This is my happy place.

Saturday, April 14, 2012

our homestead: mysterious discovery

While weeding around my garlic patch this morning, pulling up big clumps of chickweed to give to the Muscovys, I accidentally pulled this up! A morel mushroom! My first thought was, "No way! This has to be a frozen morel I tossed in the compost by mistake!", but sure enough, after digging around under the chickweed I found its little stump in the ground. I have a few theories as to why this mushroom is in my garlic patch. 1) I used some cardboard to mulch this area while I was expanding my planting bed, so perhaps one box was from a case of morel mushrooms and some spores or mushroom fragments remained, or 2) There's something present in this soil that's conducive to morel growth, whether it be all of the straw and alfalfa I've worked into my bed or rotting wood hidden below. Last summer I did try to cultivate a morel patch under one of my old apple trees by starting a small log on fire at its base and then scattering morel bits all around the log and into the soil, working ashes deep below. I've read that morels love growing on the root networks of hardwood trees, especially old apple trees, and that they often show up after there's been a forest fire. So peculiar. I didn't eat this mushroom, as it could be a false morel. But I'm pretty sure it was edible! I buried it under my apple tree. In any case, this must mean that it's starting to be morel season, so if anyone is a good picker, I'd get on out there and look.

Saturday, April 7, 2012

our homestead: easter miracle

Alright, so it's the day before Easter, but I am already in the Easter Spirit. I like Easter because it always seems like a kick-off for spring, allowing us to leave the cold of Winter behind. Now I can wear my sandals in the rain and feel less weird! Anyway, I had a little "Easter miracle" today. A few days ago I noticed that one of my Moscovy hens had been sitting in one of the nest boxes in the coop. I checked under her bumsy and didn't find any eggs, but I had a good feeling she was about to start laying. This morning when I went to let my flock out, I checked again, and sure enough! My very first duck egg was waiting for me. It's been a very sunny, warm and beautiful day out today, so I've been working in my garden most of the day. A couple hours after I'd collected the first egg, I thought I'd peek in the nest box again and to my surprise...another duck egg! Two eggs in one day! The day before Easter! I love it!
My Easter Miracle: my first two duck eggs
This leaves me wondering how many eggs my girls will start producing. I read that Moscovy ducks are supposed to lay 50 to 125 eggs a year. My husband and I want to raise our own Muscovy ducklings this year, so I might have to start getting myself learned up' on Muscovy brooding methods.

Fragrant hyacith flowers by my front door
It's been so lovely today that I took a break from yardwork to spend some time on my front porch. There's a whole hyacith patch right by my porch, with each gentle breeze comes a waft of angelic perfume. Mmm, so pleasant. I brought my cat, Spyder Munggins out with me. He has been basking in the sunshine and romping around the garden. He loves to smell flowers, I kid you not. One of these days I'm going to plant him his own kitty garden, full of catgrass and catnip and fragrant flowers.
Geting a good sunny stretch in...
...before exploring the garden, looking for flowers to smell.

I've also been working on some Easter Bunny presents for my nephews and nieces. I'm in charge of the egg hunt tomorrow and to add a special twist to the hunt, I'm going to have the chitlins also look for the Easter Bunny's nest. Inside his nest will be all these sweet little presents, one for each child.

I tried to wrap each present as "naturally" as I could by using old scraps of fabric, moss, twigs, dried flowers and feathers. Afterall, I don't think the Easter Bunny has scotch tape. I heard we're supposed to have sunny weather again tomorrow. Happy Easter and Springtime everyone!

Sunday, May 22, 2011

our homestead: first signs of asparagus and my garlic's looking good


Watching vegetables grow is so rewarding. When I'm not out weeding, mulching, hauling dirt in my wheel barrow, pruning or slug hunting, I just like to sit and admire all of the little starts I planted pushing out of the ground. Today, I spotted tiny turnip, carrot and lettuce sprouts, as well as I found some two inch onion starts and sunflowers. My peas are also vigorously climbing and are about a foot tall now. My lacinato kale starts are about half that height.
 
Anyway, I discovered a few purple asparagus spears starting to shoot out of the earth where I planted them back in April. Ha, my first thought was, "Yipee! It's working!". I really derive some simple happiness from watching things grow because whenever I plant something, I put a little hope into the success of my seeds. We've been having such a cold spring that any growth seems exceptional to me. Oh, and my garlic's looking great too! Thick, long green leaves which emit a pungent garlic aroma whenever I brush my hands by them while weeding. We'll be sure to have some gourmet roasted garlic for dinner this summer at my house!


Wednesday, May 18, 2011

our homestead: oh hey, potatoes!


All of the potatoes I planted back in early spring are growing and appear to be very healthy. I planted French La Ratte Fingerlings, Peruvian Purples and Nordland Roasters. I've been foliar feeding my potato plants about once a week now...usually I give them a little spritz of a mix of water and organic fish fertilizer (nice and stinky). I also like to crumble a little compost around each plant now and then. It also helps that I planted sugar snap peas next to my potatoes- legumes grab hold of nitrogen in the air and bring it into the soil (nitrogen promotes leafy green growth). Right now, my pea starts are about a foot tall each.

Two of the best preventatives of potato blight include crop rotation and good nutrition. I'm growing my potatoes in soil that has been free of potatoes or tomatoes or any other Nightshaders, and I'm keeping up on the nitrogen, potassium and phosphorous.

Anyway, I did my first "hilling" yesterday. Hilling- where one draws the soil up around the potato plants on either side to build a raised mound- is essential for edible tuber development as tubers that are exposed to sunlight can turn green (a green potato can give you a stomach ache). The potatoes will branch off along the stem of the plant, so in hilling the soil, I'm ensuring that my tubers will grow in darkness and thus be fit to eat. There's nothing like a new potato- fresh, buttery and sweet with thin, papery skin. Mmm...


Friday, May 6, 2011

DIY almanac: rhubarb pineapple jam


I'm fortunate to have a well-established "granny" rhubarb patch growing in my garden that returns year after year in spring (see the third picture above). When this stalky, sour vegetable (yes, rhubarb is a vegetable and is related to buckwheat and sorrel) appears, I start dreaming of rhubarb pies, sauces, cobblers and my favorite- jam! I made a strawberry rhubarb pie a week ago and I made pineapple rhubarb jam today. I'll share the recipe for the jam below, but first I want to write about rhubarb a little more because it's a pretty intriguing crop.

Rhubarb originally came from western China and was used for medicinal purposes up to 5000 years ago in the East. The plant made its way into Europe and the Romans named it after the barbarian lands wherein they had discovered it: near the River Rha in Scotland. Then, in the early 1800s, Rhubarb was brought to America. This was about the time that it really began having more of a culinary presence than medicinal. In fact, strawberry rhubarb tarts were popular in 1824.

Nutritionally, rhubarb is high in Vitamins A and C, potassium and fiber, and is said to have antioxidant effects due to its high polyphenol levels and it can apparently lower blood pressure. Some sources try to boast its high calcium content as well (more than milk), but the calcium in rhubarb is actually in the form of calcium oxalate, which counter-intuitively blocks calcium absorption. Though the stalks are safe to eat, oxalic acid is concentrated in the large, heart-shaped leaves of rhubarb and thus these are toxic.

Rhubarb is a very hearty perennial which will return each spring for up to 15 years (perhaps longer if it's well tended). Rhubarb prefers a soil pH in the 6.0-6.8 range with lots of organic matter worked in. Much like asparagus, you can plant either rhubarb seeds or crowns, but you cannot harvest stalks until the second year as rhubarb's first growing season helps it build up the energy needed to return. To keep a rhubarb plant producing stalks (or to encourage bumper crops), one should remove any flowers that form within the leaves (see the second picture above) as this means that energy is being diverted into seed production rather than stalks.

Now onto the jam! My local natural foods co-op had a post-Easter sale on pineapple, so I decided to try making a pineapple rhubarb jam, which came out a golden orange hue (almost like apricot jam) with a delicious, caramely and tart flavor. Here's my recipe and directions for making this delightful spring jam:


Ingredients
4 cups chopped rhubarb
4 cups chopped pineapple
5 cups granulated sugar
2 tablespoons brown sugar
6 ounces liquid pectin


Wash mason jars and lids in hot, soapy water or run through the dishwasher to sanitize. Prepare canning equipment (fill a stockpot with water and bring to a simmer, keep lids in a saucepan over a simmer, etc). Toss the rhubarb, pineapple and sugar into another stock pot and heat over medium, stirring to dissolve the sugar. When the sugar has fully melted, raise the heat to high and continue stirring the mixture for 30 minutes. About 15-20 minutes in, mash the mixture with a potato masher to get the best jam consistency. Keep stirring until you reach a rolling boil (a boil that keeps on going, even while you're stirring), then add the pectin. Boil and stir for 1-2 minutes, then remove your jam from the heat. Pour your jam into the jars, leaving about 1/4 an inch of head room, and wipe the rims with a clean cloth. Drop on your lids and screw on their bands, then carefully place in your other stockpot and raise the heat to high. Boil the jars for 10 minutes, remove, and allow them to rest on the counter. Delight in the little *pings* you'll hear as your jars officially seal and enjoy!

Monday, April 18, 2011

our homestead: surveying growth in a cold spring


Well, the sun decided to show itself today (finally!). What a glorious day it turned out to be- bright blue sky, big puffy mountains of clouds and a gorgeous pink and orange sunset (which I watched down on the riverbank with my dog). We've been having such a frigid spring this year. Last night's temperatures were 39 degrees Fahrenheit by my house and it tried to snow in a few spots, so I was very grateful for some sunshine today.

I spent my time outdoors starting the preparations needed for transplanting my tomatoes into my hoop house. Mainly, I have to finish ripping up the sod along the floor of the hoop house, and then I'll bring in compost and supplement the soil. Then I'll be able to direct transplant my starts into the earth. Luckily my hoop house will protect my starts from the cold (though the chill does slow the growing process).

While out and about in my yard I stopped to weed my potato and pea patch. Hooray! My sugar snap peas (bottom photo) are starting to shoot out of the soil. Not surprising since peas do fairly well in cooler climates. I also checked up on my garlic (which I planted in October), and all three varieties are growing quite well. Next year my garlic patch will become my vegetable patch and my garlic will be replanted in my current vegetable patch (right near the asparagus). I plan to do wider rows for my next garlic planting as well. Anyway, seeing that things are continuing to grow (albeit slowly) makes me hopeful for the growing season. I am chomping at the bit to plant some carrots and onions though!

Thursday, April 14, 2011

our homestead: planting asparagus crowns


I was visiting with my mom the other day when she informed me that our local nursery had $1.00 Jersey King and Sweet Purple asparagus crowns for sale. $1.00! Hot boy! That's a deal! The asparagus crowns I'd been dreaming about were retailing at around$7.00 each, thus about 30 minutes after she let me in on this great find I was at the nursery, digging through a tub of soil picking out the best 10 crowns of each variety. Such a steal...I felt like an asparagus vandal.

Asparagus is a ferny spring perennial which will last about 15 years, providing delicious crunchy spears at the very start of the growing season. The only catch- you have to let it establish itself in the first two to three years after planting it before you indulge. So, there's a bit of planning involved when you decide where you want to grow your asparagus. I chose a previously prepped, deep raised bed at the bottom of my hill that receives ample amounts of sunlight every day (asparagus loves sun!). I checked my soil about a month ago, it seemed I had a pH of about 6.5...asparagus prefers a pH range of 6.5-7.5 so before I planted my crowns I sprinkled a few handfuls of wood ashes along my bed in the hopes that it would help maintain a pH ideal for my little crowns. Asparagus crowns are really cool looking- they are essentially a clumpy bulb with several long rooty tendrils. If you hold two up under your nose they'll make an earthy mustache.

To plant the crowns I dug 20 holes, 6 inches deep and about 18 inches apart from one another. I've also heard that folks can dig a long, 6 inch trench, but I wanted to stagger my plants. I spread a few inches of homemade compost in the bottom of each hole and then gently set each crown into place, being sure to spread about all the roots as best I could. I then covered each crown with about 2 inches of soil, and as my asparagus spears emerge from the earth I'll hill soil up around them (much like you hill potatoes). I then mulched around my asparagus. Throughout the next few years I'll try to keep my crowns well-fed and weed free so that they might prosper and become a welcome friend at future springtimes.


Sunday, March 20, 2011

our homestead: welcoming spring with a potato (and pea) planting


Spring! Spring! Oh my darling, you've come back to me! In celebration of the growing season, I've spent the day digging around one of my garden patches, planting out potatoes and sugar snap peas. To prepare this year's potato patch, I was sure to clear out any pesky weeds and dig up any large stones, then I put down heaps of rich compost (potatoes love some fertile soil) and "green manure", also known as alfalfa grass, grown by a local farm. I selected three organic seed potato varieties: 1) french fingerlings (a buttery, gourmet finger-shaped tuber with a golden flesh and blush, papery skin), 2) all blue potatoes (it's safe to say that this one's my favorite- blue in hue, slightly sweet, and oh boy! it makes the best mashed potatoes with peas), and 3) classic red nordland roasters (bring on the rosemary!). I dug three long trenches about 3-4 inches deep, about 2 feet apart, and dropped a potato every 12 inches down each row before covering them up with a blanket of soil.
When their first starts emerge from the earth, I'll begin drawing up the soil around their stalks as they grow. This is known as "hilling"...essentially as your potato plant grows you build a mound around it on either side, ensuring its developing tubers aren't exposed to any sunlight as sunlight causes them to turn green. Eventually the potato plants will grow bushy (they almost look like determinate tomato plants), flower, and then they will start to turn brown. A midsummer dying potato plant marks the kickoff for potato harvesting (of course you can always dig around before this point...usually when the flowers appear...and steal a potato or two). To harvest, whole plants can be pulled up, attached tubers and all, and digging around the plant's surrounding hill will reveal even more new potatoes.
So why did I plant sugar snap peas by my potatoes? Other than the fact that a fresh sugar snap tastes like vegetable candy, peas, another cool-weather crop, are kindred spirits with developing potatoes. Peas, like all legumes, are "nitrogen fixing", meaning they'll grab a hold of nitrogen in the air and enrich their surrounding soil. Nitrogen is essential for healthy green development (leaves, stalks and shoots), and potatoes are heavy Nitrogen feeders. Want to strengthen your soil for some summer corn or tomatoes? Plant some good ol' peas now!